
The following are social media posts regarding the construction of the observatory, constituting a diary of sorts. We’ve gathered the posts here in hopes of telling the story of how the observatory came to be and how it was built. Unfortunately, because the build of the observatory itself was, almost entirely, a one-man show, photos that might have better documented construction steps and details are in short supply. Date tags are in typical U.S. MM/DD/YY format.
— Spring will arrive… eventually.
— It appears freezing weather is finally over but it has been oh, so rainy! Daily rains have dumped about 2 inches of rain on our grounds and every step on the grass produces a squishy sound, even the occasional splash. If we get a series of non-freezing days and dry weather, the paver platform for the observatory can finally be finished. Until then, we wait and literally watch the grass growing — ground’s too wet for us to run mowers on!
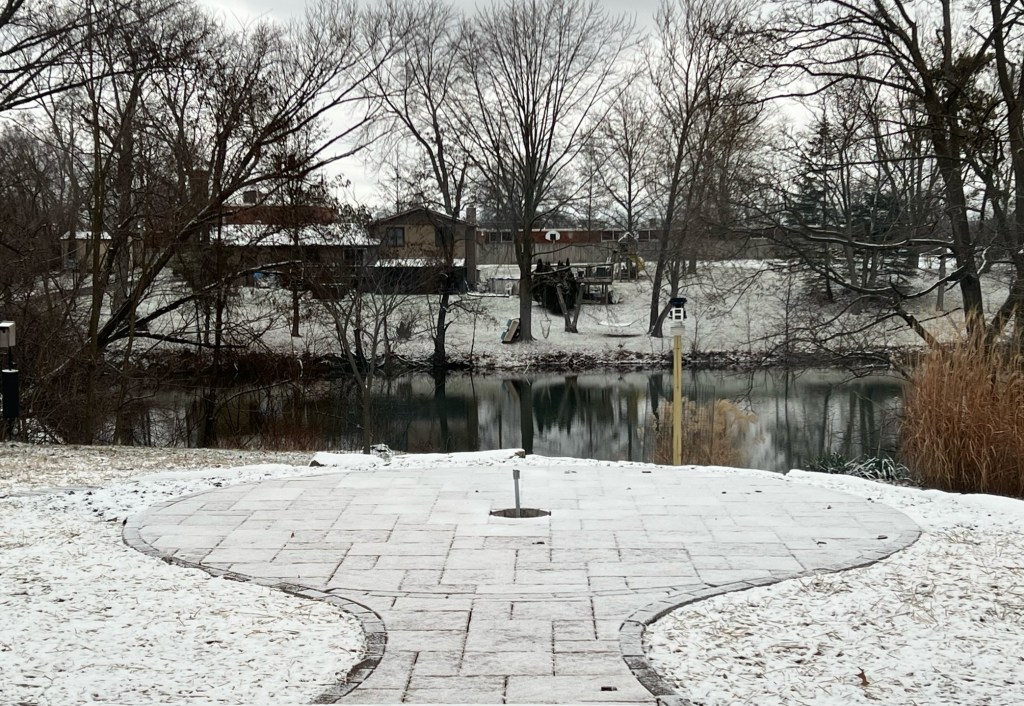
0 — Today marks the completion of the patio base for the observatory. The contractor finally found a break in the weather and applied Polybind®️ polymeric sand to the paver stones. The material immediately stabilized the stones and, after being wetted, now binds the stones together, filling the gaps sealing out insects and seeds. The observatory is or will soon be (finally) under construction and will be shipped here as a kit. A little disappointed it’s taking so long but should be worth the wait.

— Well, I just learned that fabrication of the observatory structure is still barely started. That puts us about one year behind where I thought we would now be. If it was not for the substantial non-refundable deposit made on the order, I’d be shopping around for another provider. Both angry and disappointed.
— Construction Project Update: We contacted the city’s Building Department today and asked them to “expire” our permit for construction of the observatory. We’ll reapply, and include updated information, when we learn from the manufacturer that the observatory has (at last) shipped. And to think we were concerned the observatory would arrive before we completed its infrastructure!
— We have learned that now, one year after placing our order with a fat down payment, the maker of our observatory building has not begun work on it. We chose this particular observatory for its design and materials and the hope it would be produced in a timely fashion. Other makers also take time — many, if not all, build on a per-order basis — but we feel may have been ahead right now if we had gone with our second choice. We’re now considering what to do about the situation.
— Following a lengthy silence, I’ve finally heard from the manufacturer of our observatory structure and much progress has apparently been made! The dome is nearing completion and the walls are presumably ready. I’ve been promised (again) regular updates and hope that happens.

— Word is the final parts have been or very soon will be installed on our observatory and that it, after testing, will be disassembled, packed over the holiday season, and shipped shortly thereafter! Hoping for the best and a possibly happy start to the new year.
— More shipping issues reported by our observatory maker. Severe weather problems and, unrelated shipping regulations; they have to remake the shipping crate. So tired of these delays!
— Bad News/Good News: The bad news is that the deal we made for an observatory building completely died after two years of waiting. The final straw was the manufacturer was unable — due to factors outside of his control — to ship the finished package! It was so bad, he’s leaving the US market! The good news is that I have selected a product from an alternative supplier that, ironically, I originally bypassed because it was going to be two years before he could ship. Now he ships in 6 to 8 weeks! {Because the manufacturer canceled the order, we were issued a full refund of our deposit. — JG}
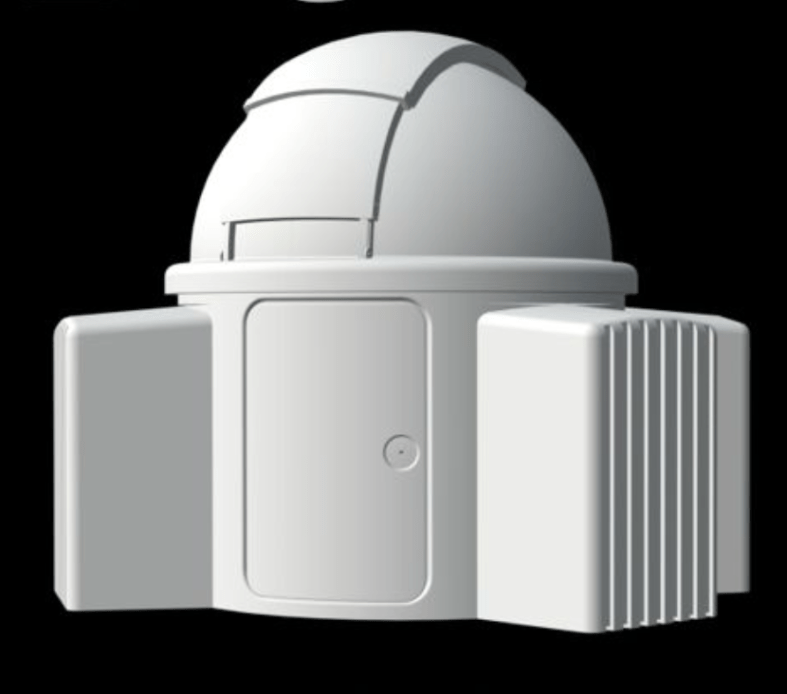
— Observatory Update: Following the unfortunate cancellation of our previous observatory building order, we quickly reevaluated our research and made a decision. We have purchased a SkyShed POD-S Mark IV domed observatory. We’re hoping it will arrive no later than mid-August (way later than we’d like but the other observatory, after two years, never arrived) and have it in operation before autumn. In the meantime, the building site awaits.
07/03/25 — This afternoon we received word that our SkyShed domed observatory ready-to-assemble (RTA) kit has shipped. Delivery is likely to take place next week. Now anxiety is setting in! Building the thing is a big job!
— We just received word that our SkyShed POD-S observatory arrives here tomorrow (July 10) by freight truck! Wish us luck wrangling the heavy pieces of this R.T.A. kit. It will be a challenge assembling the thing but I think I can manage all but one step. Hoisting the 350-pound assembled dome on to the observatory walls will require help from several strong people. I don’t yet know where those people will come from!
07/10/25 — The observatory arrived early this afternoon. After struggles getting it off the truck, and with unexpected help from a neighbor, we stowed the base wall components in the garage. I moved the dome halves myself to a patio space adjacent to the observatory site where they’ll spend the night. And that’s the end of the first day!


07/14/25 — Withering weather and a severe summer cold (ironic?) halted progress on the observatory dome assembly. This afternoon, hoping to dive into the work tomorrow morning, I set up a canopy for sun protection. The portable shade along with a good electric fan ought to help extend work time before I can’t stand the heat!
07/15/25 — Put in a long, hard, sweaty day working on the dome. Finished joining the dome halves, added the shutter rails, and started on the upper shutter. That last part — the shutter — was a bear, due to hardware components that barely fit. I broke two stainless steel bolts and may have cussed a time or two. Pushed hard today because rain expected tomorrow so no work then.
07/17/25 — Took an extra day off from construction today. While yesterday was rainy and not suited to work, I pushed too hard the day before; I paid the physical consequences with an apparent relapse/extension of my summer cold. Feeling better this evening and so hope to take advantage of improved weather and health tomorrow (Friday).
07/18/25 — We were able to complete installation of the upper shutter on the dome this afternoon. We keep hoping things will get easier but this assembly process is not easy. Maybe the next step … lower shutter install. We shall see. We already know we’ll need to do additional work on fit and finish. Weekend will bring miserable heat so we’ll probably rest up and get back at it on Monday.
7/21/25 — We were able to make a bit of progress on the dome, including installation of the lower shutter. A bracket appears to be missing so the shutter is incomplete until we receive a replacement. Hoping to make a bit more progress tomorrow as weather is expected to be pleasant. Another heat wave arrives later in the week.
8/01/25 — With help from the weather, we made a wee bit of progress on the observatory. First, we are now one step away from connecting utility power to the telescope pier. And, this afternoon, we raised the dome off the ground to allow for work on its undercarriage — a metal track circling the base of the dome. On the down side — an important bracket has gone missing in shipment!

Thanks to a couple of team members at Lowe’s Home Improvement in Wadsworth, Ohio! Whereas many bricks and pavers and blocks are to be found in the gardening/landscape supply area, plain ole concrete blocks are in lumber — construction materials. After asking, I was not only guided to the right department but the team member loaded the blocks on to a cart for me. Small things, perhaps, but I left the store happy.

08/02/25 — We completed installation of the track plates today (Saturday), lowered the dome back down to the patio surface, and removed the canopy. The missing bracket is currently in FedEx Limbo after having been discovered in their lost and found — apparently not packed properly for shipping — so THAT’S fun!
08/08/25 — Good news, at last!
1) The missing plate/bracket needed to complete the observatory dome has been rescued from FedEx Limbo. Tracking now indicates it will be delivered here Monday.
2) We have made arrangements with a local tree service company to have their crew perform the all-important lift of the dome on to the observatory’s circular base, hopefully later next week.
Now we have to get to work and build the base walls.
8/10/25 — Spent some time this morning, before the heat set in, to set up the wall panels for the observatory. They yet require a bit of leveling between each other, then they’ll be bolted together; we’re hoping to do that tomorrow morning. If things go well, the dome will top it off this coming week!

8/11/25 — Monday, Aug. 11: Working again in the morning to avoid the day’s heat, and with the help of neighbor Kelly, we bolted the base wall panels together. Overall the work went well with few adjustments needed. The door fit is suspect and we’ll be seeking a solution. We also added the dome rotation wheels at the top of the circular wall. Now awaiting word from the crew as to when they can lift the dome into place.
08/12/25 — Word from the crew chief is they don’t think a manual lift is wise — too heavy, he thinks, even for five or six strong guys! So, we’re getting a crane lift! The dome goes flying late Friday or some time Saturday. Exciting!!
08/13/25 — The threat of rain loomed Tuesday as we awaited installation of the observatory dome. Around the top of the curved base wall are wheels that will allow easy rotation of the dome — wheels set in shallow wells that we did not want to fill with water. Although the forecast indicated only a chance of light overnight showers, I set up the canopy to prevent rain collecting in the wheel wells; I’m glad I did. Overnight rain total = .63 inch!
8/13/25 — Aaaaaaannnnd it’s raining again. Good call on the canopy!

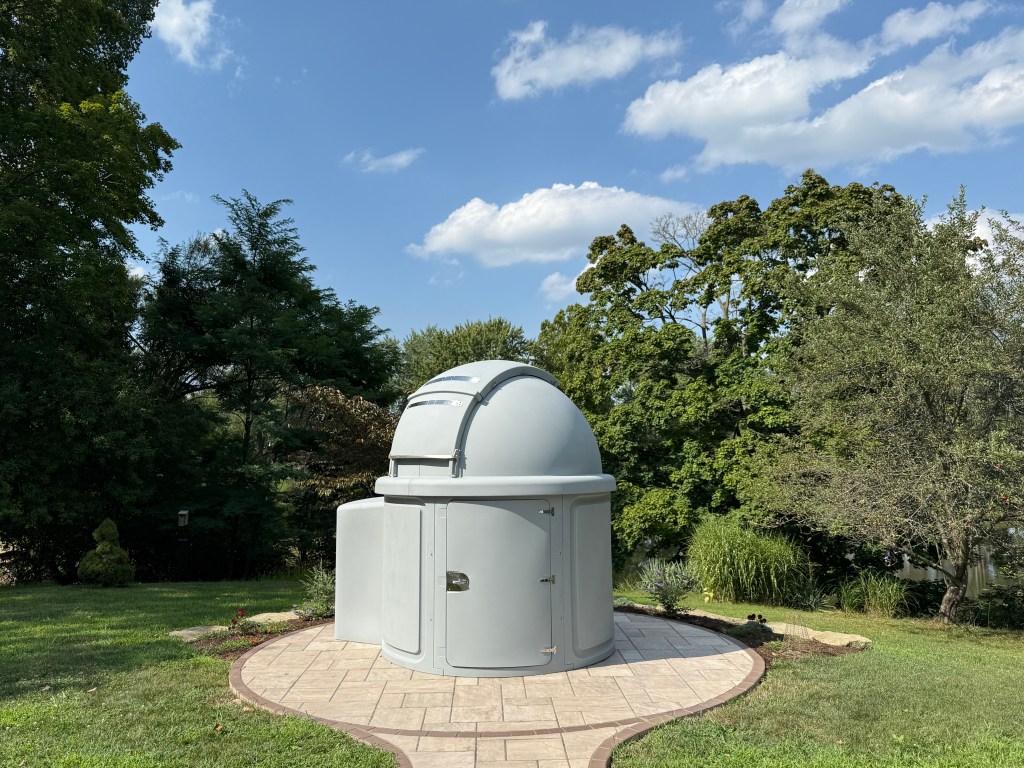
08/15/25 — Whew! As of 4:04 PM today (August 15, 2025) we have a dome! There’s still work to be done but getting the 350-pound dome atop the 5-foot walls was a big deal. A crane lift was just the ticket. The crew from Hammon Crane, Spencer, Ohio did a fine job.

08/19/25 — We experienced the first heavy rainfall here with the observatory fully assembled and exposed to the weather. Checking on it after the storm passed, we found the floor wet — pretty much expected but unwelcome — and a couple of dripping bolts in the upper aperture cover — an easy fix. I guess we’ll need to caulk the base. Or something.
08/26/25 — Caulking worked! We ran a line of roofing caulk around the outside base yesterday in preparation for expected rain … and it worked. It rained for an hour after midnight this morning. While some moisture appears to have wicked in via grout lines, there’s no standing water this morning!
08/30/25 — Connected power to the supply lines running underground to the observatory’s telescope pier site. Connections tested good but electric will remain shut off until the lines are terminated at the pier’s receptacle. This is in preparation for placement of the pier, possibly as early as tomorrow but more likely Monday.
08/31/25 — Thanks to some scrap 2X4s, surplus concrete blocks and pavers, a two-wheel dolly, and some ingenuity, I wrangled the big steel observatory pier into place and bolted it down. Didn’t need to call 9-1-1 even once! The pier, by the way, is make of quarter-inch steel and must weigh about 100 pounds. It’s already surprisingly level but we’ll next make some adjustments there and install electrical wiring. Whew!


09/02/25 — Today we terminated utility power at the pier, installing a weather-resistant box with receptacle. Power is on at the observatory! Moving on, we installed the EQ mount Pier Adapter atop the pier. Everything is leveled quite well (perfection comes later) and the adapter lightly locked down. Ran out of steam before tackling additional caulk work.
09/04/25 — Today we placed the massive Sky-Watcher EQ6-R Pro mount atop its beautiful Starizona adapter. Nice to see it there but we can’t use it yet … the bolt used to attach the mount to the adapter is missing! Aaaarrrrrgggg!

09/05/25 — After visiting Ace Hardware, Home Depot, and True Value Hardware today, I was unable to find the appropriate bolt in stainless steel. It’s also hard to find large diameter metric fasteners. I settled for a black oxide piece as a temporary fix. I ordered a stainless steel bolt from the adapter manufacturer for later permanent installation.
09/07/25 — Our first nighttime work under the dome was to set polar alignment on the mount. About 45 minutes of adjustments later, we’re pretty happy with what we got. Locked it down. Closed the dome. Maybe set up a telescope tomorrow night, or try daytime solar imaging! Most construction tools and materials have been removed but we’ve got a bit more caulking and sealing to do. Also the ventilation fan should be arriving soon.

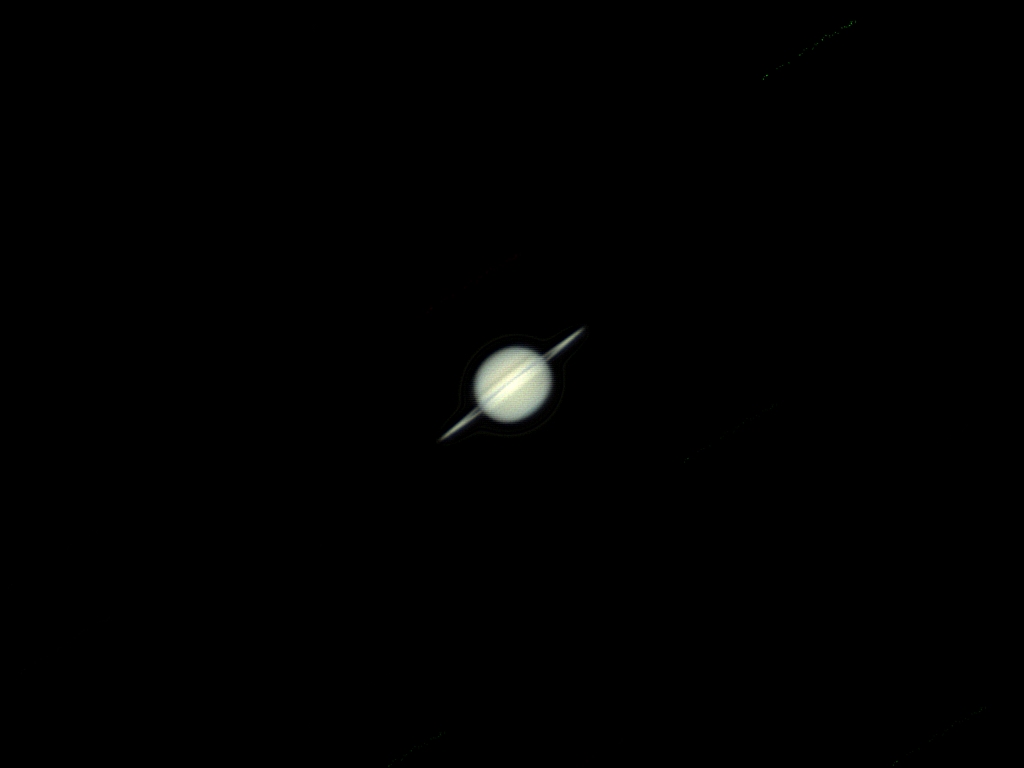
09/11/25 — We got the telescope (one of several available) mounted up this morning, hoping for First Light from the observatory tonight! We’ll be aiming for Saturn as it approaches opposition.

09/12/25 — First Light for the observatory went pretty well. Alignment on a permanent pier is SO MUCH EASIER and, one hopes, is more permanent as well. Saturn was hiding in neighboring trees when we began so we checked out Moon. Last night’s images of Saturn weren’t great but we’ll get there! If you haven’t seen Saturn lately, the rings appear nearly on edge now — thus the knife-edge appearance here. So very nice to be under a dome again! Delighted to get a look at and an even a crude photo of Saturn whilst its rings were edge-on. The planet’s tilt toward Earth puts the rings edge-on from our vantage about every 13 to 15 years. I’ve only seen this once before, that I recall, a long, long time ago!